


Applying Gaussian Noise to Images: Understanding the Effects and Python Implementation
Computer Vision (Part 18)

📚Chapter: 2-Image As Function
If you want to read more articles about Computer Vision, don’t forget to stay tuned because we reach end to end:) click here.
Sections
Apply Gaussian Noise Quiz
Apply Gaussian Noise Solution
Section 1- Apply Gaussian Noise Quiz
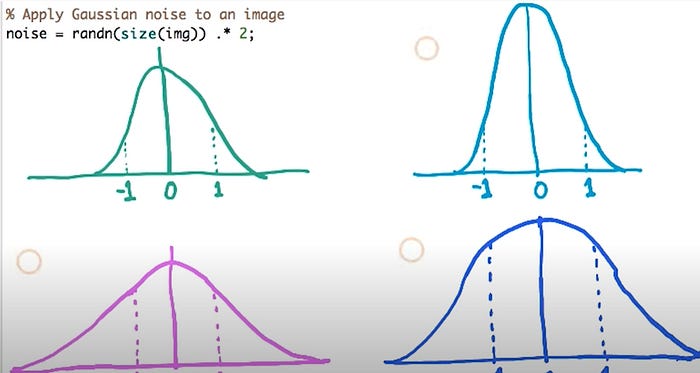
Given an image img you know that its size is size of img and you can generate a noise image of the same size by passing this to randn. The values in this noise image will be normally distributed around zero. With standard deviation of one. What happens when you multiply each of these generated values by two? How does this affect the resulting distribution? Does it increase the counts? Does it increase the spread? Or both? Mark the right answer.
Section 2- Apply Gaussian Noise solution
The correct answer is that it only increases the spread. Note that we are only multiplying the values. The number of values, or their counts, are unchanged. Multiplying a set of normally distributed numbers by a value effectively changes the standard deviation of the distribution they were drawn from. Now why is this important to know? Remember that randn generates values with standard deviation one, whereas the images we’ve been using are of type uint8 and range from zero to 255.

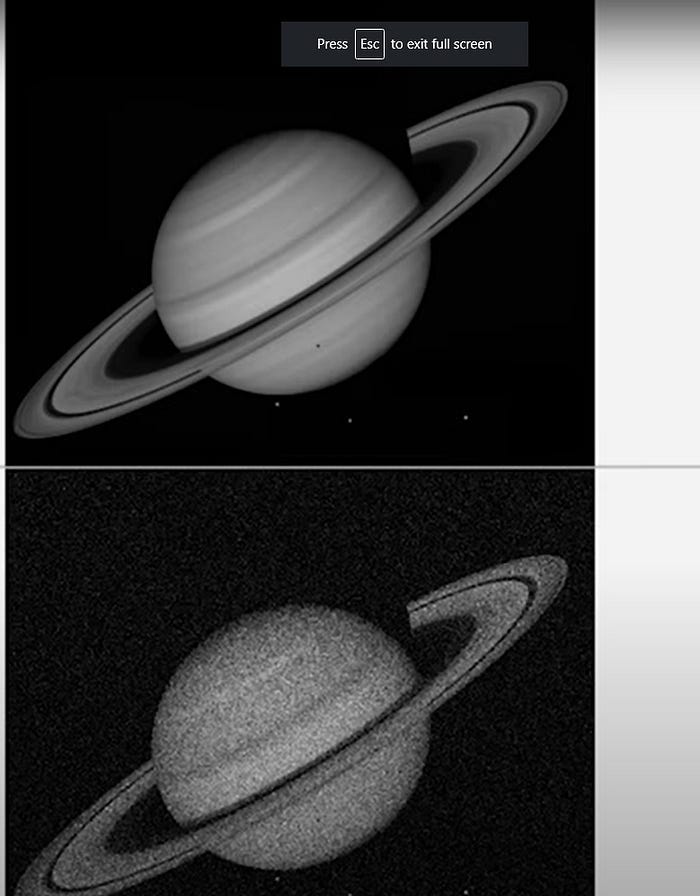
What do you think happens when you add the results of randn directly to an image? Let’s find out. Time to use a new image. If you look carefully you’ll be able to see three moons and a shadow. Now we generate our noise image and add it to the original. Not really very different, is it? This is because the values that randn generated are really small compared to the image. Let’s scale up the values. Now you can see the noise affecting the image. How about we increase this further? And more. Now it’s really hard to see the moons, isn’t it?

Python Code
import numpy as np
import cv2  # Assuming you want to use OpenCV for image display

# Load your image using OpenCV or any other library
img = cv2.imread('your_image_path.jpg', cv2.IMREAD_COLOR)

# Generate Gaussian noise with the same size as the image
noise = np.random.randn(*img.shape) * 25

# Add the noise to the image
output = img + noise

# Display the original and noisy images
cv2.imshow('Original Image', img)
cv2.imshow('Noisy Image', output)
cv2.waitKey(0)
cv2.destroyAllWindows()
In this Python code:
np.random.randn(*img.shape)generates Gaussian noise with the same size as the image.img + noiseadds the generated noise to the original image.cv2.imshowis used to display the original and noisy images. Make sure to replace'your_image_path.jpg'with the path to your actual image.
Let’s connect: If you found this helpful, share your thoughts or questions in the comments! 😊
👨🏫 Learn More and Join the Community
🚀 Want to dive deeper into:
Python 🐍
Machine Learning 📊
Deep Learning📈
Statistics 📚
Computer Vision 👁️
Research & AI 🧠
Then login and enroll at Coursesteach for exclusive tutorials, notebooks, and mentoring!
👉 Follow the series and give it a 👏 if you found this helpful.
📘 Explore more:
📘 Explore more:
Course: Computer Vision Basics
📝 Notebook: Included in the GitHub Repo
📁 GitHub Repository: Stay synced with the code
💬 Are you a Computer Vision expert? Have suggestions? Drop them in the comments and contribute!
🎓 Remember — learning is a continuous journey. So keep learning, creating, and sharing. 💻✌️